 Do you have a Facebook Page with a reasonable number of likes but dwindling organic reach / engagement?
Facebook made it clear that the last algorithm update centered around ‘engagement’, which means that posts generating good conversation between people will show higher in the News Feed (if you haven’t read about it yet, check out our recent article Facebook Update: ‘Bringing People Together’).
Also, back in June 2017 at the first Facebook Communities Summit, Facebook revealed “More than 1 billion people around the world use Groups, and more than 100 million people are members of “meaningful groups…. we’re setting a goal to help 1 billion people join meaningful communities like these.”
So, bearing this in mind and the fact that a Facebook Group is specifically designed to encourage conversations – is it time for you to start your own business group community, linked to your Facebook business page?
How To Create A Facebook Group Linked To Your Page
Step 1 – Have a look at the tabs on your business page & see if you have one called ‘Groups’
Don’t worry if you don’t, you can add one by going to ‘Settings – Edit Page, then scroll down to bottom to ‘Add a Tab’ – where you can select Groups.
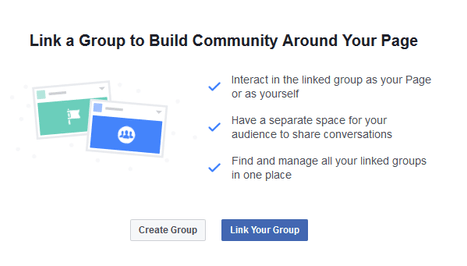
Step 2 – Click on the Groups tab to display 2 options. Create a Group, or Link Your Group (if you already have one this is where you can link it to your page).
Step 3 – Click ‘Create Group’ and follow the instructions to:
- Name your group – you can either ‘niche’ and have several different groups for different aspects of your business, or one group with a name that is connected to your business in some way so it’s recognisable.
- Add some people – WARNING, anyone you add here will automatically be added to your group with the option to leave, rather than inviting them to join. Whilst you can add a personal note to go along with the invitation, I DO NOT recommend adding people this way and wish Facebook would change how this works. I suggest you contact a few people separately before you create the group to see if they would be happy for you to add them in, so you can follow this process without upsetting anyone and therefore have a few immediate members.
- Select the group privacy – there are 3 types;
Public – anyone can find the group in searches and everything is fully visible (member or not). People can join without being approved.
Closed – I generally recommend this type. Again anyone can find the group (which is important), and see who is in it, but only members can see the posts / content.
Secret – this is more exclusive. The only way for people to find this group type and request to join is by receiving a link, or being invited by the group owner, or an existing member.
Next Personalise Your Facebook Group Information
Add a good group cover image
The recommended size is 1,640px by 856px (or 1.91:1 ratio). This image can include text and should instantly give people a feel for what the group is all about.
Next, there are 4 horizontal tabs under your group photo, the last of which is ‘ …More’. In here, you will find an option to ‘edit group settings’, which is where you:
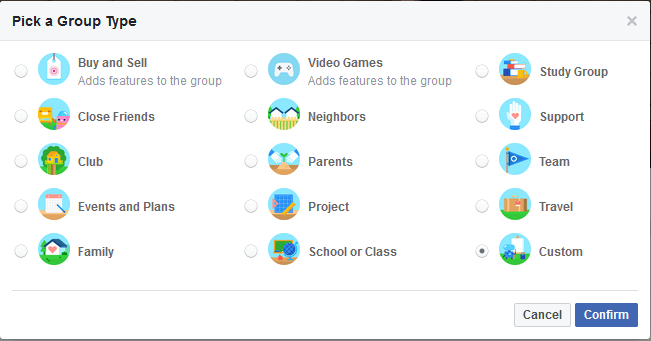
Select a Group Type (these are the options)
Add a description
Add here what your group is all about. You have plenty of space (up to 3,000 characters) and often admins will set some ground rules in here and warn people that breaking the rules may result in them being banned from the group.
Add a few tags
This is a strange one. Tags can help people find your group however you have to pick carefully otherwise you can find yourself linking to someone else’s page or group instead of a ‘generic’ subject matter.
Set your location
You can be specific or just select ‘Global’
Set your URL
Instead of having a group link full of numbers such as: www.facebook.com/groups/1665460343846569/, make it more user friendly and easier to use by changing to your group name: www.facebook.com/groups/yourgroupname/
Now It’s Time To Get Active!
Share your group on your business page so people know it exists. Consider offering a freebie / download / workbook to anyone who joins (you can place it in the files section of the group).
Send the group link in a personal message to people who you think would benefit from becoming a member. This adds a personal touch and as a result you should get some quick wins in terms of boosting your member numbers.
Mention your group in your newsletters / customer and prospect emails.
Then of course, start posting in the group itself.
In the early stages, you may feel like it requires a lot of effort of your part – but believe me it is worth it. The aim is to simply get the conversation going, to encourage members to start posting and build trust with your audience. Over time, members will create a lot of the content so you can be more reactive.
Whilst the group is in its infancy I recommend you DO NOT blatantly trying to promote / sell anything as this will more than likely trigger members to leave. You build up to this over time. Instead:
- Share something of value to your members – hints & tips which people can action straight away (no email capture or opt-in requirement).
- Create a poll
- Ask questions
- Put some structure in place e.g. a weekly Facebook live (or a video upload) on a specific day / time, or a weekly Q&A session.
Remember, like you can on a Page, an individual post can be pinned to the top of the group, especially if it’s getting a lot of attention.
Learn To Utilise Facebook Group Features
Ask pending member questions – this is a great way to immediately get to know your members or to make sure they are aware of, and agree to the group rules. You access this function in ‘Manage Group | Member Requests’ and can ask up to 3 questions, the answer to which will only be visible to an admin or moderator. NOTE: once you approve a member, their answers will no longer be accessible, so it may be worth screen capturing or putting the details into a spreadsheet.
Do regular welcome posts – people like to be made to feel welcome, so once in a while do a post to tag your newest members & invite them to say/share something.
Familiarise yourself with your members by viewing ‘Member Profiles’ – just click on a member name in your group and their profile will pop up.
Group insights – once your group reaches 50 members or more, your group insights will become available. You can use them to find out a number of things e.g. best times to post, who are the most active members etc. Note: Demographic information is only availble once the group reaches 250 members.
Use the scheduling tool – planning ahead can save a lot of time and it’s a great way to achieve a good level of consistency
[bctt tweet=”Is it time for you to start your own business Facebook Group, linked to your Business page?” username=”yellbusiness”]
That’s it for now – over to you to take action. Set up your Facebook Group, start building your community and let me know how you get on!


